
This project was a bit of a speed sewing challenge for me, as this dress was meant for a Cyberpunk themed party that was happening a week from when I started. Inspired by the time-crunch creations created on the Netflix show “Next in Fashion,” I thought of the yard of holographic snake scale fabric I had and a cheap stretch pleather dress hanging in my closet and said to myself, “Why not?” I bought the pleather dress for a Vegas trip last fall, and while the style suited me the pleather was already stretched out in the straps. So, I decided to use it as a sewing pattern to make a copy for myself.
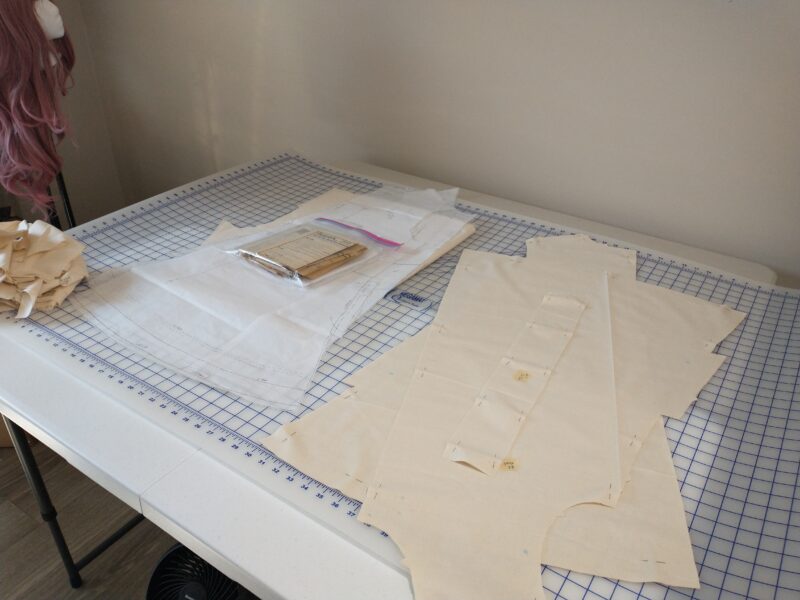
I have tried to use clothes I owned as a sewing pattern in the past, but tracing around a sewn garment always gave me patterns that were too small on me. For this dress, I decided to seam-rip it and use each of the pieces as a pattern. I’m pretty proud of the result, especially as this was my first time sewing a garment without any sewing instructions. I’ve broken down the process below. Hope this tutorial will be helpful in copying your own clothes!
Analyzing Your Garment
Before I started taking a seam ripper to the dress, I took a bunch of close-up pictures of all the seams and made the following notes
- Measured the seam allowance of every seam (mine was a quarter inch over the whole dress)
- Measured the width of the hem (a half inch on the bottom of the dress)
- Any unique qualities in the garment, such as lining, length and width of sleeves, any collars, ect. For my dress I took note of:
- How the cups of the dress were lined and sewn together
- The length and width of the straps
- How the straps were sewn inside the top of the cups
I made a lot of these notes while seam ripping, and made sure to take pictures of how pieces of the dress were put together before taking them apart.


With the dress in pieces and pictures in hand, I made an ordered list on how to sew the dress together:
- Sew cup lining and cups together
- Sew the straps
- Sew lining and strap to cups and understitch those seams
- Sew cups to front of dress
- Sew side seams, leaving a quarter inch at the top of the back of dress
- Fold over the top back of the dress a quarter inch to create hem
- Sew other end of straps to back
- Hem bottom of dress

Cutting out the Holographic Fabric
Since the seam lines were already marked, I used the dress as pattern pieces. It did save a little bit of time to not have to trace all the pieces of the dress to tissue paper. I cut all the pieces on a single layer of fabric, so I wouldn’t have to deal with any shifting fabric. It also gave me more control on how I wanted the snake scale pattern to look on each piece.

Sewing the Dress
While I followed the steps listed above, I still ran into a couple challenges. First was the straps, which took a few tries to get right. Besides never sewing spaghetti straps before, it didn’t help that the snake scale fabric took some coxing to iron down. After doing a little research, the method that worked did involve some ironing. I ironed the strap in half, then ironed the edges to the crease in the middle, and I was able to sew the strap closed along the side.
Second was figuring out the right tension on the machine for this holographic stretch fabric. I started with the same tension I used for my blue one-shoulder dress, which was one less than the recommended tension on the machine. By the time I got to the straps I realized it was still too high. Fortunately I was able to get it right for the top of the dress, the side seams, and the hem. Trying it on, the cups ended up slightly too big under the arm and I think that’s because I stretched out the fabric using the higher tension.
Third issue is that the straps needed to be shortened. Since I secured them with three or four close stitches, I could only fold them down and hand-sewn them to the stitches I already made.


The Reveal

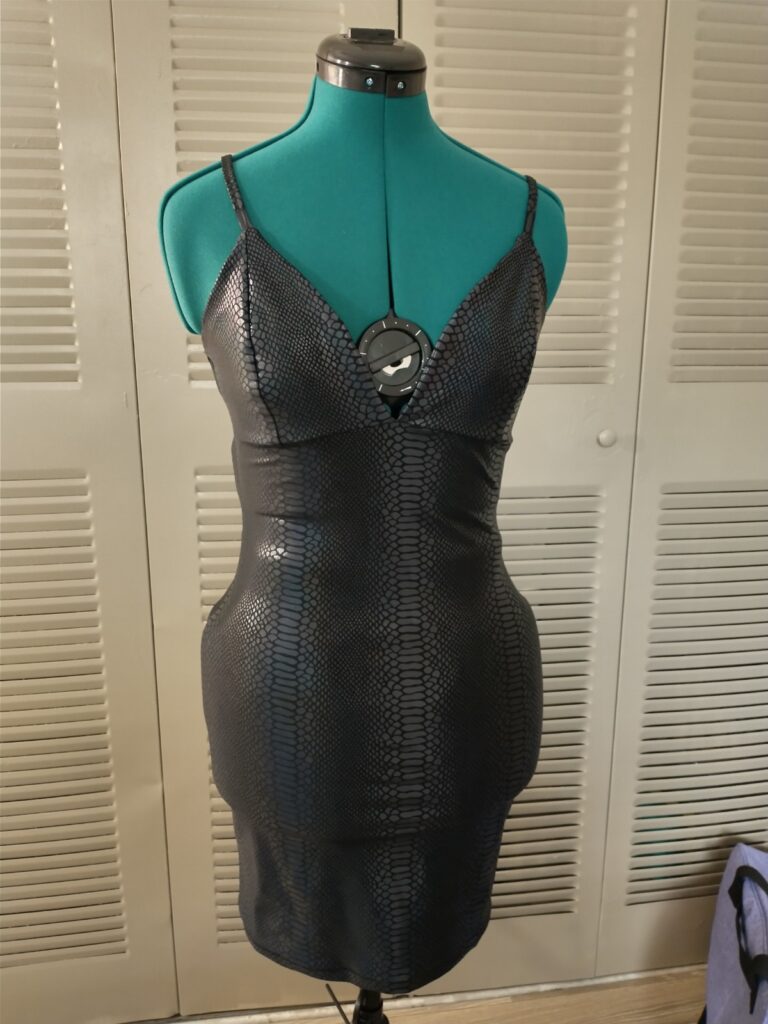
Overall, I’m really happy with how this dress turned out. The fabric is thick enough to achieve the close fit without worry of it being see through, and I looove the holographic effect of the fabric. This project was also great practice in sewing with stretch fabric, and I learned how to sew spaghetti straps. Ironically, the party I planned to wear this dress to was rescheduled to a date that I can’t attend, so I’ll have to find a fun night out for this dress.
With this short sewing detour out of the way, it’s time to get back to my 70s swing coat. My goal is to get it finished by the end of April, so I have a little time to sew some of my warmer weather garments ahead of summer.

1 Comment
Add Yours →All I can say is WOW!!!!!. I can’t wait to see it on you! Amazing creative design! Love it❤️❤️